Sunday, July 11, 2010

Fitting the deck


My apologies to Stealth Perfomance Products, for the above photograph does not do justice to the beautiful shapes of the Evolution (on the left) and the Swift. Stealth Performance Products

The picture serves to illustrate the difference between the wider and shorter Evo and the equally elegant Swift. (The white deposit on the Evo is "blushing" of the epoxy which is the result of a chemical reaction between the epoxy and humidity in the air. It is of little concern and needs o be sanded off before further coating can be done)
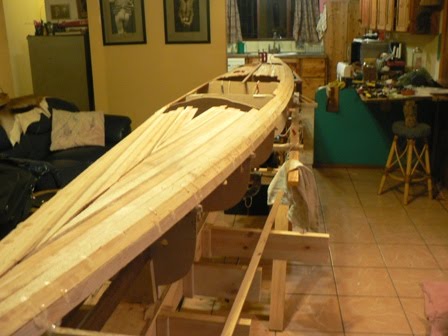
FITTING THE DECK
As can be expected there is a certain amount of spring-back of the hull as the forms (stations) are removed from the hull before fitting the deck. This was much less than I expected and a little reshaping of the edges of the deck had to be done to make the deck fit the hull. I did not join the centre of the deck (as can be seen on the pic.) and this will be done with a decorative strip once the deck is fixed permanently in position.

A FEW THOUGHTS ON THE CONSTRUCTION SO FAR AND BEYOND
In general is has gone well. When stripping the hull I did find myself , from time to time, standing and staring at the beautifull, sleek shape of the Swift emerging, and admiring the genius of the design.

Could not help feeling humble to be entrusted with the building of the first Stealth Swift.


Bruce uses Rhinoceros software to design his watercraft (not only kayaks) and it is his intention that the Swift, once completed, be submitted the Projects Gallery on the web site of the software company.


I must admit that I envy the guys (mainly in the USA) that buy their pre-cut , tested kits to build their beautifull kayaks. From what I see on their discussions forum, my problems are not unlike theirs. On the other hand, it is so much more satisfying to attempt a project that's never been done before.


Special thanks to the guys on the Fishing Corner Forum for the encouragement and humorous support

http://www.fishingcorner.co.za/index.php?option=com_kunena&Itemid=28&func=view&catid=2&id=7133


Tuesday, July 6, 2010

Stripping complete


The rocker and curve of the hull on the picture above looks exagerated, but the Swift actually has a beautiful slender shape.


"Just another day in Paradise"

One advantage of working in the house is that you can listen to music like the above song by the Eagles.

However, when I got home after graft on Thursday I found that the domestic servant had the washing machine drain on the bedroom carpet. Again.

Then, after I serviced the bird feeder I found that I had stepped into some dog poo in the garden and left some spots on the lounge floor. Having cleaned that up I went to the bathroom to wash up and found that the dog had also pee'd on the floor.

To top it all, with my wife being in Northern Namibia, I dreamt the previous night of fishing for Tigers in the Kwando River in the Caprivi. I don't even know if the Kwando has Tiger fish.

"Bid the violence farewell and learn to be still" the Eagles carried on.

Yeah, right!

What I actually wanted to do is get some serious teeth marks onto that Halco Sorcerer lure that I had bought fro Brett at Stealth.( Stealth Performance Products )
Teeth marks from something like this that Mick Clarke had caught some two weeks ago.
(Mick is not a short guy). Photo courtesy Mick's web site (http://www.kayakfishingsa.co.za)


Next

I am eager to see how the deck will fit on the hull but before further work can be done on the Swift, the stripped cockpit methology will have to be sorted out. In the mean time work will also be resumed on the Evolution.


Monday, June 28, 2010

The Hull


For those who are wondering if I'm building the kayak in the lounge - yes, I am because the missus is in Namibia for a couple of weeks. It is not due to a lack of space but it is so much more convenient!

In defence I qoute from the One Ocean Kayak Web Site:


"Wood strip kayaks are being built right now by amateur builders in garages, sheds, lofts, basements, hallways, attics and of course in livingrooms and bedrooms! Few people even asked me how to build their kayak in TWO sections so that it would fit in their space. It seems like the ingenuity and persistence of the wood strip builder just knows no limits. Looking at the fruits of their labor, it is easy to understand why; The muse of creativity will not be silenced."


Even though the Swift is almost 1,5m longer than the Evolution, it will take me about 30% of the time to do the stripping mainly due to experience and better tools. The workmanship has also improved somewhat.


1. Lining up the frames

Due to the length (5,5m) of the Swift, I wanted to take extra care in lining up the frames.

Two 4mm holes were drilled through the frames (clamped together) and by peering through these holes to a piece of red cardboard at the far end of the strongback, the frames were reasonably well lined up. (I wish I had one of those lazer pointers to assist with this.)

2. Deadline


I want to complete the strips by Saturday (it is now Tuesday). The Swift must be moved outside and I need to resume the epoxy on the Evolution. Some serious consultation with Bruce ( Stealth Performance Products ) will be required to discuss the methology of making a stripped cockpit.


3 Off the topic


I made this decorative "popper" lure for Mick Clarke for the pub at his guesthouse.
http://www.umkomaasguesthouse.com/


The idea was based on the popper below that Bennie Jordaan (a deep sea fisherman of note) had made for me. I regard Bennie as a master in the art and technique of lure making. Not only is his craftsmanship impeccable but his attention to detail, swimming action, etc. of the lures is amazing.


A recently completed lure as posted by Bennie on the Sealine Forum:


He also has an online fishing tackle shop: http://www.demontackle.co.za/

3 Next Project:


Just joking!!

This is a 72 foot schooner being built in Vietnam. The "strips" are in two layers with a total thickness of 58mm.

Sunday, June 6, 2010

1 WOODEN STRIP KAYAK WITH WOODEN STRIP COCKPIT


Due to the slow curing time of the glassed epoxy on the hull of the Cedar strip Evolution, production ground douwn to a halt.While waiting for the epoy to cure, I started on a new project.
This is a 5.5 m long touring kayak that Bruce Challenor (
Stealth Performance Products ) designed for himself and is keen to see it made from strips.

This time it will be a "sit-on-top" kayak as per the picture. The cockpit area will be roughly shaped in strips of wood and the final shape will be milled out using a CNC milling machine.
During my extensive travels on the Web I never came across a fully enclosed, stripped, sit-on-top kayak. Will this be a first?


Did I mention before that Bruce is full of innovative ideas?

I am not keen on using staples or nails to hold the strips in place after gluing because the tiny holes are always visible afterwards - or even worse, using permanent copper or brass nails as is done in some factories. So, I am sticking to the method of gluing individual strips - one after the other.


When stripping the Evolution, the most time was spent in aligning the clamps so that the strips are angled correctly when the epoxy cured. Some of the strips also gradually slipped out of alignment when the epoxy was curing.


When the stripping of the deck of the Swift was done, I used the following clamping system which saved a tremendous amount of time. Due to the cost of the C-clamps, I made my own.


Usung wooden wedges, the angle of clamping force can easily be adjusted.

Having done the glassing of the Evo - and the shining surface emerged - I realised how important it is to lay the strips fair, flush and with great care to avoid even the slightest "hollows & bumps" on the surface later on. My sanding of the Evo was also a bit heavy-handed in some areas - resulting in slight hollows which only became apparent on the shiny surface. I shopuld have used the fairing board more as Bruce had suggested and (dare I say it?) not the belt sander.

The backbone of the 6m long strongback being constructed:


I managed to salvage the white butcher's band saw literally minutes before it was loaded onto a truck bound for the dump. It had been used in the Pathology Department of a hospital and it took some time cleaning "stuff" from the insides. I installed a 3/4 HP motor and is being used to cut the strips.